How to Plan a Vegetable Garden Layout

Planning a vegetable garden layout can be a fun and rewarding experience for any gardener. Whether you are a seasoned pro or a beginner, having a well-designed garden layout can help you maximize your yield and make the most of your growing space.

When planning your garden layout, there are several factors to consider. First, you’ll need to decide what type of vegetables you want to grow and how much space you have available. You’ll also need to think about the layout of your garden beds, the spacing between plants, and the amount of sunlight each area of your garden receives.

By taking the time to carefully plan your vegetable garden layout, you can create a beautiful and productive garden that will provide you with fresh, healthy produce all season long. So whether you’re looking to grow a few tomatoes or a whole garden full of veggies, with a little planning and preparation, you can have a successful and rewarding growing season.

Choosing a Location

When planning a vegetable garden, one of the most important factors to consider is the location. Here are some things to keep in mind when choosing a spot for your garden:

  • Sunlight: Vegetables need at least 6 hours of direct sunlight per day to grow well. Look for a spot that gets plenty of sun, ideally in the morning and early afternoon.
  • Soil: The soil in your garden should be rich in nutrients and well-draining. Avoid areas with heavy clay soil or soil that is constantly wet. If you’re unsure about the quality of your soil, consider getting it tested by a local extension office.
  • Water: Your garden should be located near a water source, such as a hose or spigot. You’ll need to water your plants regularly, especially during hot, dry weather.
  • Easy to Access: Choose a location that is easy to access and close to your home. This will make it easier to tend to your garden and harvest your crops.
  • Size: Consider the size of your garden when choosing a location. Make sure there is enough space for all of the vegetables you want to grow, as well as pathways for walking and working.

By keeping these factors in mind, you can choose a location that will provide the best growing conditions for your vegetable garden.

Deciding What to Grow

When planning a vegetable garden, it’s important to choose plants that will thrive in your climate and soil conditions. I like to start by considering what vegetables my family enjoys eating and which ones are the most expensive to buy at the grocery store. This helps me prioritize what to grow.

Another factor to consider is the amount of space you have available. If you have a small garden, you may want to focus on growing vegetables that are high-yielding and take up less space, such as tomatoes, peppers, and cucumbers. If you have more space, you can consider growing larger plants like corn or pumpkins.

It’s also important to think about the timing of your harvest. Some vegetables, like lettuce and spinach, have a short growing season and can be harvested multiple times throughout the year. Others, like tomatoes and peppers, have a longer growing season and may only produce one or two harvests.

Finally, consider the level of maintenance required for each plant. Some vegetables, like zucchini and squash, are relatively easy to grow and require minimal maintenance. Others, like broccoli and cauliflower, require more attention and may be more challenging for novice gardeners.

Companion Planting

When planning a vegetable garden layout, according to Backyard Gardeners Network, it’s important to consider companion planting. Companion planting is the practice of planting different crops together that have a beneficial relationship with each other. This can help improve soil health, reduce pest problems, and increase yields.

For example, planting peas with beets can be beneficial because the peas fix nitrogen in the soil, and the beets need a heavy dose of nitrogen to grow.

Another example is planting basil with tomatoes. Basil repels pests that commonly attack tomatoes, such as aphids and whiteflies. Plus, the aroma of basil can improve the flavor of tomatoes.

Here are some other examples of companion planting:

  • Planting carrots with onions can help deter carrot flies.
  • Planting marigolds with vegetables can help repel nematodes and other pests.
  • Planting chamomile with vegetables can help improve soil health and attract beneficial insects.

When planning your vegetable garden layout, consider incorporating companion planting to help improve the health and productivity of your plants.

Layout Design

When planning the layout of your vegetable garden, there are a few different options to consider. The layout you choose will depend on your available space, the types of plants you want to grow, and your personal preferences.

Traditional Rows

One common layout for vegetable gardens is traditional rows. This involves planting rows of vegetables with space between them for walking and maintenance. This layout is great for larger gardens with plenty of space, and it can make it easier to use large equipment like tillers.

When using traditional rows, it’s important to plan for crop rotation to prevent soil-borne diseases and pests. You can also use companion planting to improve soil health and deter pests.

Raised Beds

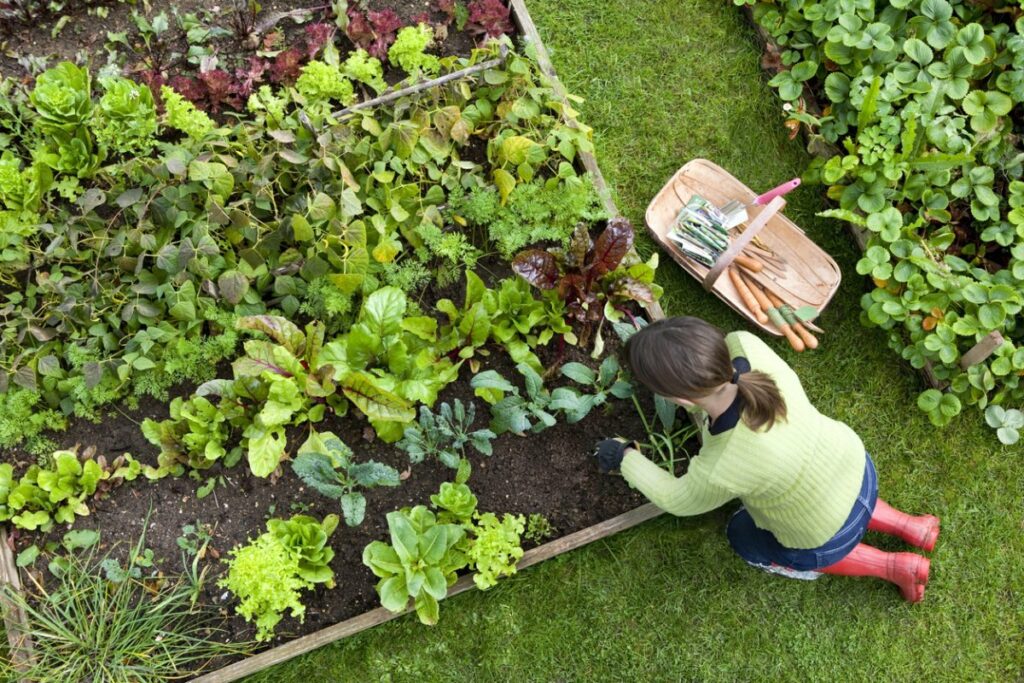
Raised beds are another popular layout option for vegetable gardens. This involves creating raised areas of soil that are easier to access and maintain. Raised beds can be great for smaller gardens or for gardeners with limited mobility.

When using raised beds, it’s important to use high-quality soil and to plan for proper drainage. You can also use trellises and other vertical structures to maximize space and improve yields.

Square Foot Gardening

Square foot gardening is a layout method that involves dividing your garden into small, square sections. Each section is then planted with a specific number of plants, depending on the size of the plant and the spacing requirements.

This layout is great for small gardens or for gardeners who want to maximize their yields in a limited space. Square foot gardening can also be easier to maintain and harvest, since each section is clearly defined.

Layout TypeProsCons
Traditional RowsEasier to use large equipmentRequires more space
Raised BedsEasier to access and maintainRequires high-quality soil and proper drainage
Square Foot GardeningMaximizes yields in limited spaceRequires careful planning and spacing

Conclusion

Planning a vegetable garden layout can be a fun and rewarding experience. By taking the time to consider factors such as sunlight, soil quality, and companion planting, you can create a garden that is both productive and aesthetically pleasing.

Remember that there is no one-size-fits-all approach to garden planning. The layout that works best for you will depend on your individual needs and preferences. Don’t be afraid to experiment and try new things!

With a little bit of planning and preparation, you can enjoy a bountiful harvest of fresh, nutritious vegetables all season long. So grab your gardening gloves and get started!
Earthwise 16-Inch Electric Tiller, Cultivator Review

Earthwise 16-Inch Electric Tiller

We’ve always had an interest in gardening and growing our own vegetables. However, for the past several years, with my wife and I working full-time jobs and caring for four kids, there never seemed to be time to care for a garden.

My how times have changed! We’re still very busy as usual, but the current world situation has motivated us to become more self-sufficient, especially regarding food. We don’t have a large yard but it’s big enough for a few garden plots, and over the past several weeks, that’s exactly what we created.

For now, we built our garden plots directly in the ground. In the future, I plan wrap the plots with wood for a more finished look.

Most people know this, but before you go and plant, it’s important to cultivate the soil. There’s never been a need for us to own a tiller, so I was a bit overwhelmed at just how many options there are out there. Here’s how we narrowed down our selection:

  • Because our garden plots are small, we didn’t need to purchase a large machine.
  • There’s pros and cons to owning corded equipment, but in this case, corded was the option for us.
  • This had to be a machine that we could order online.

After a few hours of researching tillers online, we chose to purchase the Earthwise 16-Inch 13.5 Amp Corded Electric Tiller/Cultivator from The Home Depot.

Earthwise 16-Inch Electric Tiller, Cultivator

After using this tiller, I can pleasantly tell you – from my actual experience – that I love it. Yes, dealing with a cord can be a hassle, but having someone walk along with you to help with the cord makes it much easier to deal with.

In my opinion, the pluses far outweigh that minor inconvenience.

  • At around $135, you’re buying a lot of tiller for a great price.
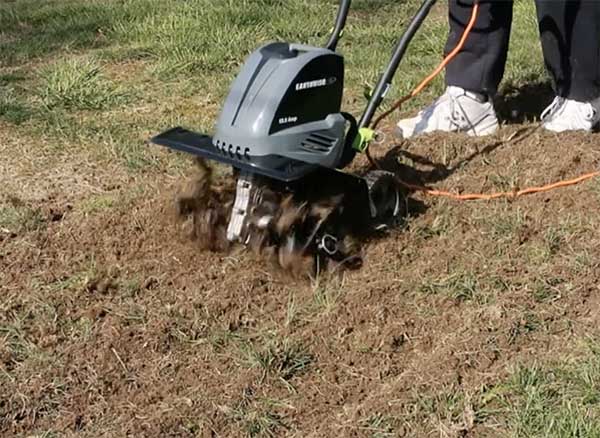
  • This tiller easily ripped up the well-established grass roots in our yard.
  • Compared to large walk-behind tillers, this one is lightweight (approximately 30 lbs) and easy to move.
  • The wheels can flip up for tilling and flip back down for easy transport.
  • No gas means no fumes and no worrying about keeping gasoline around.

This Earthwise tiller also pulled up most rocks and stones. There were a few times when the tines got snagged on larger stones, but after shutting it down all I had to do is pull them out. We live in a rural county full of buried stones, so you’re probably not likely to hit as many as I did.

In short, this tiller is a great buy for homeowners like me who don’t need a large machine to get the job done. The Earthwise 16-Inch 13.5 Amp Corded Electric Tiller/Cultivator from The Home Depot is a great machine with a great price.

Gardening Made Easy With This DIY Mobile Elevated Planter

Gardening Made Easy With This DIY Mobile Elevated Planter

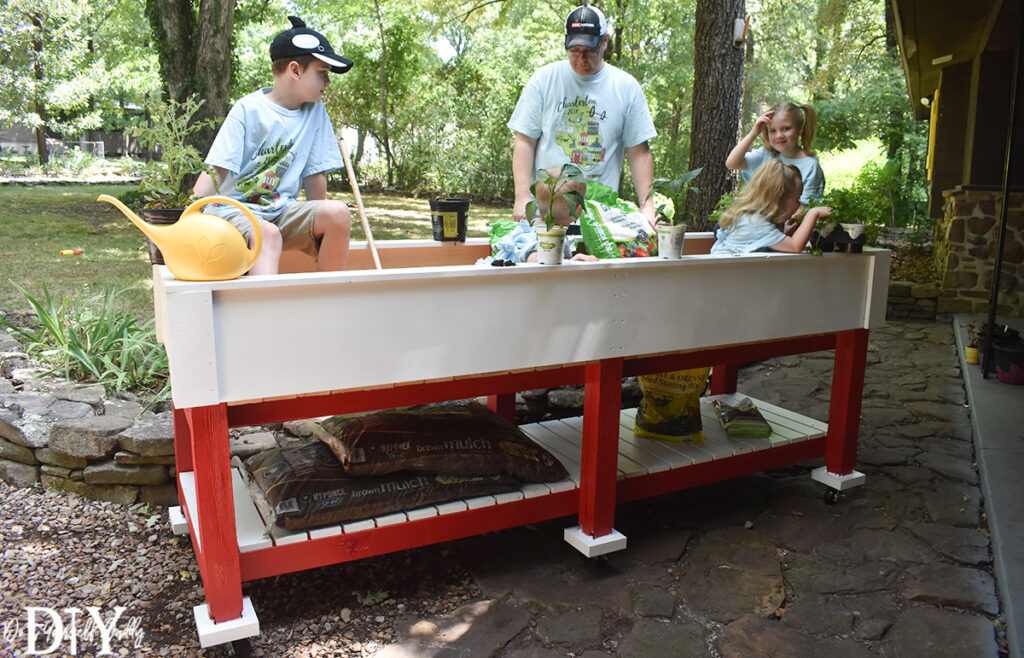
Gardening is fun and is essential for producing healthy, organic food! This DIY mobile elevated planter is great if you’re limited on space for a garden, or if you’d like a much more convenient height to cultivate your plants.

In this article, I’ll show you how to build a large planter that you can wheel around, which is great if you want to move your planter for better sun or water opportunities, and even into a garage during cold winter nights.

Step One: DIY Mobile Elevated Planter Plans

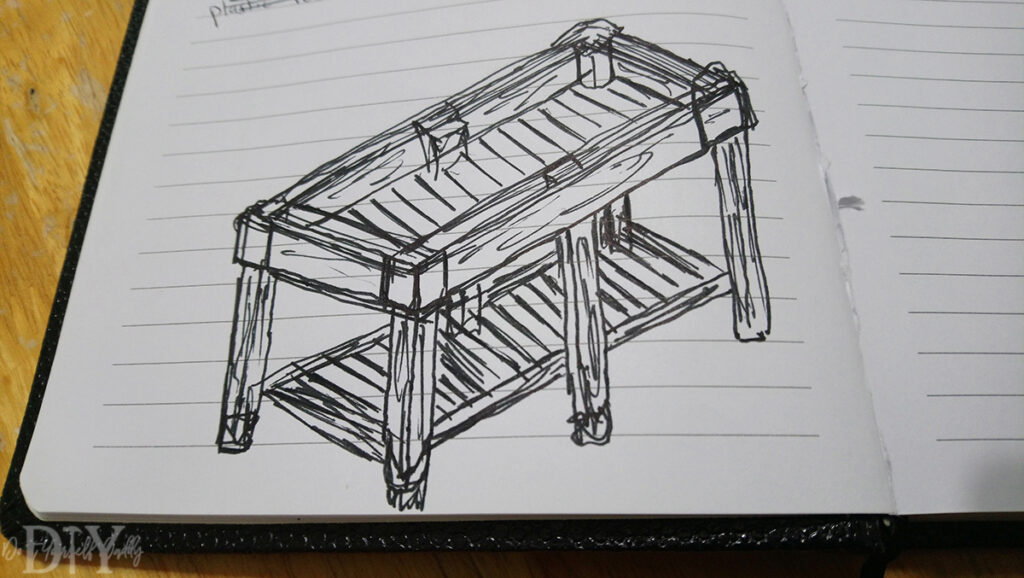
My drawing above is terrible I know, but that’s my original concept for an elevated planter. I knew I wanted to build it fairly heavy duty because no one wants the bottom falling out of a planter over time. I planned for 4×4 posts for the legs and 2x4s for the rest of the structure. Using exterior grade screws and lots of Gorilla Wood Glue made this beast of a planter super strong. The bottom shelf should also hold up under the weight of stored items like soil bags.

The 2x4s that serve as the base of the planter box are unpainted and untreated, so they’ll need to be replaced over time. Because of that, I simply cut them to size and laid them down without fastening them with screws. That way if you need to replace a board, all you have to do is pull it up with ease and replace it with another 2×4.

The 1x12s that serve as the planter box sides are fastened with screws, but they can be removed fairly easy too. Basically, the planter box boards that will rot over time are designed to be easily removed.

Be sure to drill pilot holes before adding screws so you don’t split the wood.

Step Two: Framing The DIY Mobile Elevated Planter

Using a square is a great way to keep your pencil lines nice and straight. I used Gorilla Wood Glue in addition to screws at every place where the wood joined together to give this planter an even stronger hold.

To start out, you’ll need six 4×4 posts cut at 36″, and two 4x4s cut at 8′. Attach these pieces together. Mount the 2x4s to the center of the end 4×4 posts to allow the future cross-2x4s to sit flush on the ends. Next, add two more 2x4s – 12″ from the top of the 4×4 posts to the top of the 2x4s.

The cross 2x4s (25″L) that I mentioned above, they’ll attach to both sides of the planter. Make sure your 8′ horizontal 2x4s are facing inward. Now add four more 2x4s that’ll serve as center bracing.

Finally, add six more 2x4s that will further brace the planter and add support to the planter box and bottom shelf.

Step Three: Time To Paint With The FLEXiO 3000

Time to bring out the awesome Wagner FLEXiO 3000 Sprayer! I’ve used this sprayer on several projects now and am loving it. This time I even used the Detail Finish Nozzle which gave me even more precision on much of this planter. Here’s some quick FLEXiO 3000 details:

o X-Boost® Power Dial – 9 settings for various coatings & precise control
o iSpray® Nozzle – For walls and siding
o 1 ½ quart cup covers up to a 10’ by 12’ wall in one fill
o Material adjustment with numbered settings
o Lock-n-Go® split gun design for quick cleaning
o Sturdy carrying case for easy storage
o Detail Finish Nozzle – For small projects & a smooth finish
o Cleans up in 5 minutes – just five parts to rinse off

First up is a coat of KILZ 2 LATEX. I use KILZ for any painting project because it’s a great sealer and primer. Looking back, I should have left the top of the 4×4 posts unpainted because they lie inside the planter box. I really wanted to leave all wood that touches the dirt to be left untreated.

Adding the BEHR Paint for the first time was exciting for me! I chose red and white (Color codes P140-7 and PPU18-07) for a farmhouse vibe. The white serves as the trim color and the bottom shelf slats were the first to receive it.

Use a small piece of trim wood to determine the gaps in-between the white 1×4 shelf slats to achieve equal spacing on the whole span. Lay out the entire span before nailing it off so you can move the slats around and adjust as needed. I used a nail gun to attach the slats (25″L) to the bottom frame.

Step Four: Adding Casters

You probably noticed already: I designed this planter to be heavy duty! In addition to the weight of the frame itself, the planter box and the shelf underneath is built to hold a lot of weight themselves. The last thing you want is this thing to fall apart, leaving a massive dirty mess.

Therefore, adding wheels is a must if you want to move this thing around, even if it’s just to move it a few inches. I bought 175-pound-rated casters for about $6 each at Home Depot; the convenience factor is worth the expense to me.

Unfortunately, the mounting hole pattern on the casters was an oversight on my part. When I bought them (Home Depot is an hour away from me) I didn’t think to make sure they would line up properly with the bottom of the 4×4 posts… they didn’t. So, after flipping the entire frame over, I added 6×6 blocks on the bottom of the 4×4 posts.

Next came drawing out the mounting hole spacing and drilling the holes. I needed to chisel off some of the 4×4 posts to allow for the bolt alignment. You’ll need to buy the proper bolts, washers, and nuts for the casters (don’t forget locking washers!). Mount the casters using a socket wrench and regular wrench and paint the 6×6 blocks white.

Again, there was a bit of extra work necessary because of my hole pattern oversight, but overall I think the results turned out well.

Step Five: Building The Planter Box

After spraying the 1x12x8s and 1x4x10s with KILZ and the white BEHR paint, I wrapped the 1x12s around the exposed tops of the 4x4s. They are mounted flush to the tops on the 4x4s. The two sides are full 1x12x8s and the ends are cut to size.

Next is the floor of the planter box. I was able to use scrap 2x4s from broken down pallets, which both utilized used wood and saved some money. As you can see, I cut the 2x4s so they cover the entire bottom side-side-to-side (32″L), but did not screw them in place. This is untreated wood so it will rot eventually. If you ever need to replace a 2×4, simply pull it up with ease and replace it with another one!

For the corner trim cap, simply cut pieces from the 1×12 planks, cut a 45-degree angle on the insides, butt them up and nail them off.

Use the 1x4x10s for the top railing, again using 45-degree angles in the corners. I screwed the top railing into the top of the 1×12 sides after measuring to make sure I would hit them center.

At this point you’re pretty much done building! All that was left for me was using a hole punch to knock down any high brad nails and touch up paint. I would lay down a garden liner inside the planter box before adding soil to prevent it from leaking through the gaps.

Total material cost for me was about $250. As usual, I tried to utilize scrap wood wherever possible to save money. Finding free pallets and pallet crates that you can dismantle is a great way to store up free wood for projects like this!

Check out my other work here.

Happy gardening!